Finding Rhythm in Long Exposure Landscapes

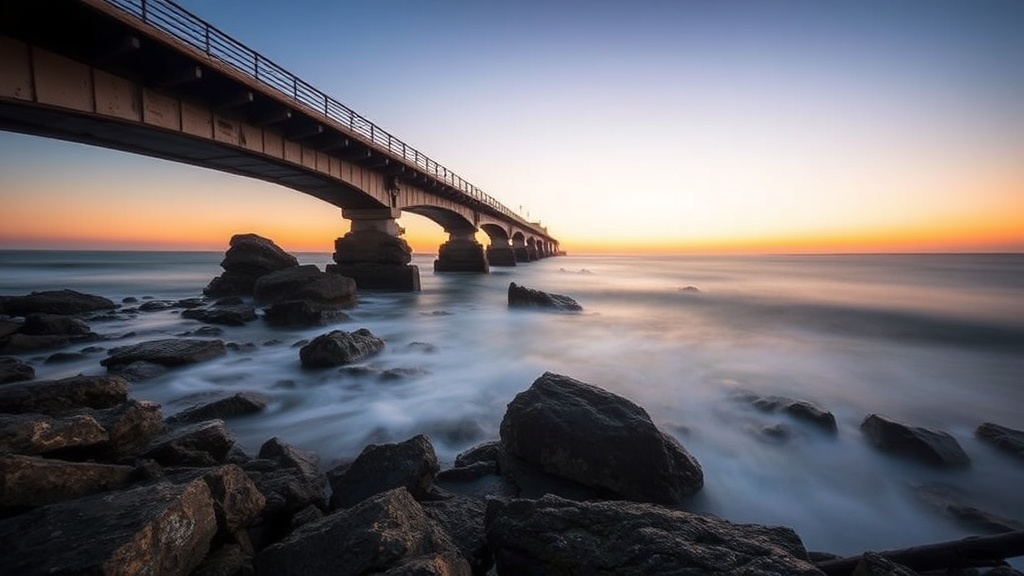
Imagine standing on a rocky coastline in Nova Scotia as the tide rushes in. You're shooting at 1/15th of a second, and the water looks like a chaotic, messy blur that ruins the sharpness of the rocks. To fix this, you need to move into long exposure territory—using shutter speeds of 2 seconds, 30 seconds, or even several minutes—to turn that chaotic water into a smooth, rhythmic texture. This post breaks down how to use shutter speed to find patterns in movement, the specific gear needed to keep your shots sharp, and how to read the weather to get the best results.
Long exposure photography isn't just about making water look "milky." It's about finding a sense of motion that the human eye can't actually perceive in real-time. When you stretch time, you're essentially painting with light and movement. If you don't get the timing right, you just end up with a blurry mess that lacks any intentionality.
What Gear Do You Need for Long Exposure?
You need a sturdy tripod, a remote shutter release, and a set of Neutral Density (ND) filters to successfully shoot long exposures in daylight. Without these tools, your camera's sensor will be overwhelmed by light, resulting in a completely blown-out white frame.
First, let's talk about the tripod. If you're shooting on a windy beach or a jagged mountain ridge, a flimsy travel tripod won't cut it. I personally use the Manfrotto 055 Series because it has the weight and stability required to keep a heavy DSLR or mirrorless setup still during a 30-second exposure. You can't afford even a millimeter of movement—not even from a light breeze—or the entire shot is ruined.
Next, you need ND filters. These act like sunglasses for your lens. They reduce the amount of light entering the camera, allowing you to use much slower shutter speeds without overexposing the image. There are two main types you'll encounter:
- Fixed ND Filters: These have a set density, like a 6-stop or 10-stop filter. They're great for consistent use.
- Variable ND Filters: These allow you to rotate the filter to change the density. They're handy, but they can sometimes introduce color casts or "X-patterns" on your lens.
- GND (Graduated Neutral Density) Filters: These are half-dark and half-clear. They're perfect for balancing a bright sky with a dark foreground in a landscape shot.
The remote shutter release is also a big one. Even pressing the shutter button with your finger creates enough vibration to shake the camera. A simple cable release or a wireless remote from a brand like Profoto or even the built-in timer function on your camera can mitigate this. (Pro tip: use a 2-second timer if you don't have a remote handy.)
| Filter Strength (Stops) | Typical Use Case | Effect on Shutter Speed |
|---|---|---|
| 3-Stop | Late afternoon/Golden hour | Slightly slows motion |
| 6-Stop | Overcast days/Sunset | Creates soft water textures |
| 10-Stop | Bright midday sun | Creates "misty" or "glassy" water |
How Do You Choose the Right Shutter Speed?
The right shutter speed depends entirely on the type of movement you want to emphasize in your frame. If you want a sense of motion without losing all detail, use shorter speeds; if you want a surreal, ethereal look, use longer speeds.
I've found that there's a "sweet spot" for different elements in a landscape. Water is the most common subject for this technique, but it reacts differently depending on the speed. If you're shooting a small stream, a 1-second exposure might show the movement of the water while keeping the rocks underneath visible. If you go to 30 seconds, that stream becomes a flat, white sheet.
Here is a quick guide for shutter speed intentions:
- 1/2 to 2 Seconds: Good for showing "streaks" in waves or moving clouds. It retains a sense of direction in the water.
- 5 to 15 Seconds: This is the range for "silky" water. It smooths out the ripples but still feels like a liquid.
- 30 Seconds or More: This is for that "glassy" look. It completely erases the texture of the water, making it look like a solid surface.
One thing to keep in mind: if you're shooting stars or the Milky Way, you aren't actually doing a "long exposure" in the traditional sense of a 30-second ND filter shot. You're doing a long exposure to capture light. But when we're talking about landscapes with water or clouds, the goal is to manipulate the texture of the elements through time.
Don't forget to check your histogram. When you're using heavy ND filters, it's easy to accidentally underexpose the shadows. I always check my shot on the back of the screen to ensure I haven't lost all the detail in the dark rocks or cliffs.
Why Does My Long Exposure Look Blurry or Out of Focus?
Your image is likely blurry because of either camera shake or a lack of depth of field. To fix this, you must use a tripod and a higher f-stop number to ensure the entire scene remains sharp.
A common mistake is using a wide aperture like f/2.8 to get a shallow depth of field. While that looks great for portraits, it's a disaster for long exposure landscapes. If your aperture is too wide, only a tiny sliver of your landscape will be in focus. You'll have a sharp rock in the foreground, but the distant mountains will be a blurry mess. I usually aim for f/8 to f/11. This provides a deep enough depth of field to keep most of the scene sharp without causing diffraction issues.
Another thing—check your lens sharpness. When you use a heavy ND filter, you're essentially putting a piece of glass in front of your lens that can degrade quality. If you're using a high-quality lens like a Canon L-series or a Nikon S-line, you'll notice much less degradation. If you're using a kit lens, you might see some softness around the edges of your frame.
Also, watch out for "diffraction." If you stop down too far—say, to f/22—the light waves actually start to bend around the aperture blades, which actually makes the whole image look softer. It's a bit counterintuitive, but more "stop-down" doesn't always mean more "sharp." Stick to the middle ground of your lens's capabilities.
"The beauty of long exposure isn't in the perfection of the shot, but in the intentionality of the motion you've captured."
When I'm out in the field, I spend a lot of time just watching the water. I'm not just looking at the scenery; I'm looking at the rhythm. Is the tide coming in or going out? Are the waves hitting the rocks with force, or are they gentle ripples? Understanding the rhythm of the environment tells you exactly how long your shutter needs to stay open. If the waves are aggressive, a 5-second exposure might actually look better than a 30-second one, because you'll see the "hit" of the wave before it smooths out.
It's also worth noting that the weather plays a huge role. A cloudy day is actually a photographer's best friend when doing long exposures. The clouds act as a giant natural softbox, reducing the harsh shadows and making it much easier to manage your exposure levels. On a bright, sunny day, you'll find yourself fighting against the light to keep your shadows from becoming pure black voids.
If you're shooting in the desert or near a waterfall, the principles remain the same. You're looking for a way to translate the passage of time into a visual element. Whether it's the movement of sand dunes or the flow of a river, the goal is to use time to tell a story that a single moment can't.